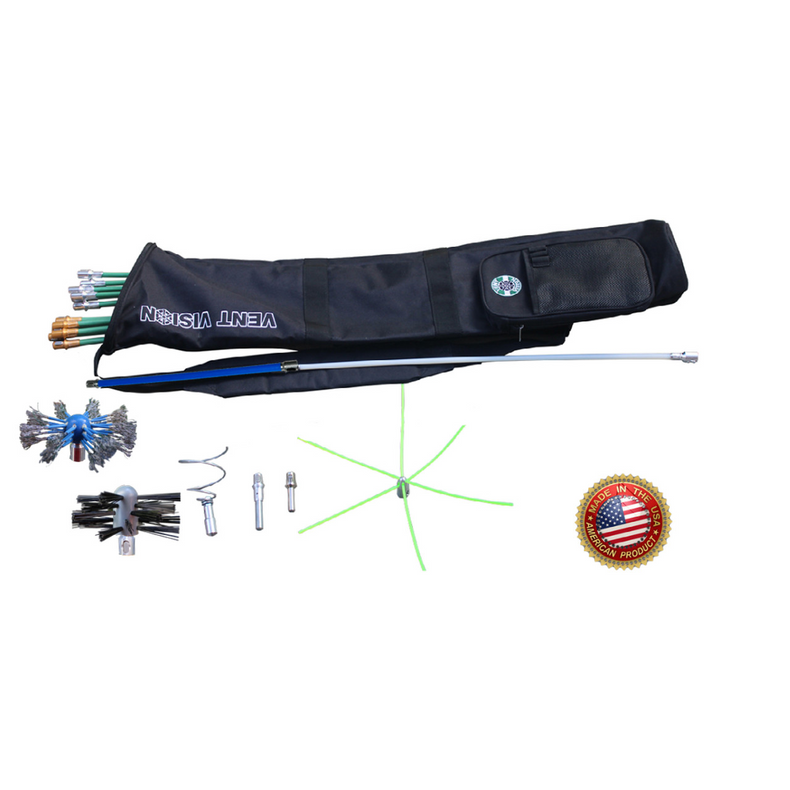
Cleaning dryer vents is essential for maintaining the efficiency and safety of your dryer. Over time, lint and debris can accumulate in the dryer vent, restricting airflow and increasing the risk of fire. While professional dryer vent cleaning services are available, you can also clean your dryer vent yourself with the right vent cleaning tools and techniques. Here is a DIY guide on how to clean dryer vents properly:
Gather the Necessary Vent Cleaning Tools
Before starting, gather the following tools and materials:
Disconnect the Dryer
Start by unplugging the dryer from the power outlet or turning off the electricity supply at the circuit breaker. If your dryer is gas-powered, turn off the gas supply valve as well. Move the dryer away from the wall to access the vent.
Remove the Vent Cover
Locate the dryer vent hood on the exterior wall of your home. Use a screwdriver to loosen and remove the screws holding the vent cover in place. Set the screws aside in a safe place.
Inspect the Vent Cover and Vent Opening
Check the dryer vent cover and vent opening for any signs of damage, such as cracks, rust, or debris buildup. Clean the vent cover using a brush or damp cloth to remove dirt and lint.
Attach the Vent Cleaning Tool
Attach the vent brush or vacuum attachment to the end of the flexible rod included in the dryer vent cleaning kit. Make sure it is securely attached to prevent it from coming loose during cleaning.
Insert the Cleaning Tool into the Vent
Carefully insert the vent cleaning tool into the dryer vent opening inside the house. Push it gently but firmly through the vent duct, extending it as far as possible. Use caution to avoid damaging the vent or dislodging any connections.
Clean the Vent Duct
Once the cleaning tool is inserted into the vent, rotate it clockwise to loosen and dislodge lint and debris stuck to the walls of the vent duct. Pull the tool back slowly to remove the loosened debris. Repeat this process several times until the vent duct is clean.
Clean the Vent from the Exterior:
Move outside to the location of the dryer vent hood. Insert the cleaning tool into the vent opening and repeat the same process of rotating and pulling to remove lint and debris from the exterior portion of the vent duct.
Reattach the Vent Cover
After cleaning both the interior and exterior sections of the vent duct, reattach the vent cover to the exterior wall using the screws removed earlier. Ensure it is securely fastened to prevent it from coming loose.
Reconnect the Dryer
Move the dryer back into its original position and reconnect it to the power supply, or turn on the electricity and gas supply if necessary. Plug in the dryer and ensure it's functioning properly.
Test the Dryer
Run a test cycle on the dryer to ensure that it is operating efficiently and that there are no blockages in the vent duct. Monitor the dryer during operation to check for any unusual noises or signs of airflow restriction.
Schedule Regular Maintenance
To prevent future buildup of lint and debris, schedule regular dryer vent cleaning at least once a year. This will help maintain the efficiency and safety of your dryer and reduce the risk of fire hazards.
By following these DIY steps and using the appropriate dryer vent cleaning tools, you can effectively clean your dryer vent and ensure the safe and efficient operation of your dryer.
Simplify Vent Cleaning with Superior Vent Cleaning Tools
Regular maintenance is key to preventing lint buildup and minimizing the risk of dryer-related fires, so make it a part of your home maintenance routine. We provide a premium dryer vent cleaning kit that provides an exceptional vent cleaning experience. Contact us today to learn more about our vent cleaning tools.
For more updates, follow us on Facebook.

